Building your own custom PC is an exciting and rewarding experience. It allows you to create a machine tailored to your needs while potentially saving money compared to pre-built systems. Whether you’re aiming for a high-performance gaming rig or a simple office computer, this guide will take you through the process step by step.
Plan Your Custom PC Build
Proper planning is crucial to ensure your custom PC meets your needs and functions effectively.
Decide Your PC’s Purpose
The first step is to determine what your PC will primarily be used for.
- If you’re building a gaming PC, you’ll need a powerful graphics card like the NVIDIA GeForce RTX 4060 and a fast processor.
- For content creation, prioritize a high-end CPU like the AMD Ryzen 9 7900X and plenty of RAM, such as 32GB.
- For general use, a mid-range processor like the Intel Core i5-13400F and integrated graphics may suffice.
Set a Budget
Establish a realistic budget for your PC build. Factor in the costs of core components, peripherals, and any additional software. Entry-level builds can cost around $500, while high-end setups may exceed $1500. Setting a clear budget will help you prioritize essential parts.
Research Components and Compatibility
Compatibility is critical when selecting components. Use tools like PCPartPicker to check for issues, such as whether the CPU and motherboard share the same socket or if the GPU fits in your case. Research thoroughly to avoid bottlenecks or unnecessary expenses.
Gather the Necessary Components
Once your plan is in place, gather all the components and tools needed for the build.
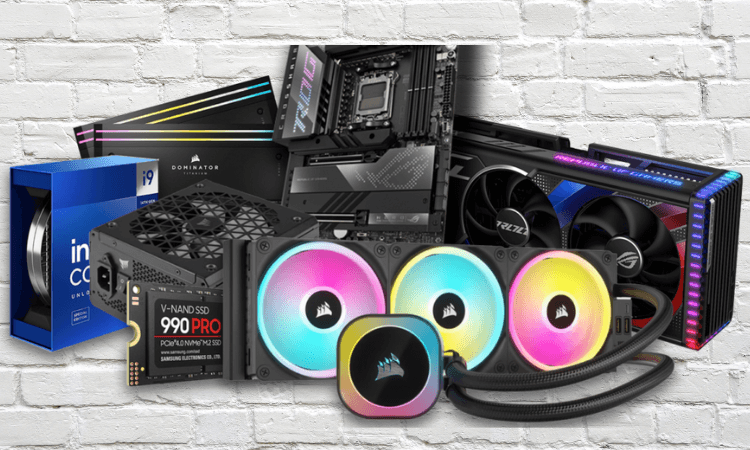
Essential PC Parts
Your custom PC requires these main components:
- Processor (CPU): The system’s brain, handling all tasks.
- Graphics Card (GPU): Renders images and videos, essential for gaming and editing.
- Motherboard: Connects all components and determines upgrade options.
- Memory (RAM): Enables multitasking; 16GB is a good starting point.
- Storage: Choose SSDs for faster performance or HDDs for higher capacity.
- Power Supply Unit (PSU): Provides reliable power to the system.
- Case: Holds all components; ensure it fits your motherboard and GPU.
Peripherals and Extras
In addition to core components, select peripherals like a monitor, keyboard, and mouse. For example, a 144Hz monitor is ideal for gaming, while a mechanical keyboard can enhance the typing experience.
Order from Reliable Sources
To avoid defective parts or scams, buy from trusted retailers like Newegg, Amazon, or Micro Center. Always check warranties and return policies.
Prepare for Assembly
Preparation ensures a smooth and efficient assembly process.
Create a Clean Workspace
Set up a clutter-free, well-lit area with a large surface to work on. Gather basic tools like a Phillips-head screwdriver and an anti-static wristband to prevent damage to sensitive components.
Read Component Manuals
Before starting, read the instruction manuals for your motherboard, CPU, and other parts. These guides contain important details specific to each component.
Test Components Before Installation
To save time troubleshooting later, test critical components like the CPU, RAM, and GPU outside the case. Connect them to the motherboard and power supply to ensure they function correctly.
Assemble Your Custom PC
Assembling your PC involves connecting all components in a specific order. Follow these steps carefully.
Install the CPU and RAM
- Open the CPU socket on the motherboard and align the processor with the marked triangle. Gently place it and secure the latch.
- Insert the RAM sticks into their designated slots, pressing until you hear a click.
Mount the Motherboard
Attach the I/O shield to the case and align the motherboard with the pre-installed standoffs. Secure it with screws, ensuring it’s firmly in place.
Install Storage and the Power Supply
- Mount SSDs or HDDs in the case’s drive bays.
- Connect the storage to the motherboard using SATA cables or M.2 slots for SSDs.
- Place the power supply unit in its designated space and connect the cables to the motherboard, CPU, and GPU.
Add the GPU and Cooling System
Insert the GPU into the PCIe slot on the motherboard and secure it with screws. If using a liquid cooling system, follow the manufacturer’s guide for installation. Proper cable management ensures optimal airflow and makes future upgrades easier.
Test and Optimize Your PC
Once the assembly is complete, test your PC to ensure it works properly.
Power On and Enter the BIOS
Turn on your PC and enter the BIOS by pressing a designated key (e.g., F2 or Delete) during startup. Check that all components are detected and set the boot drive.
Install the Operating System
Use a bootable USB drive to install your preferred operating system, such as Windows 11 or Linux. After installation, update all drivers for your hardware by downloading them from the manufacturers’ websites.
Final Touches and Maintenance
After your PC is fully operational, there are a few final steps to enhance its performance and longevity.
Organize Cables
Tidy up the cables inside your case using zip ties or Velcro straps. This not only improves airflow but also makes future maintenance easier.
Plan Regular Maintenance
To keep your PC in top condition:
- Clean the interior every few months using compressed air to remove dust.
- Update software and drivers regularly to maintain performance and security.
Conclusion
Building a custom PC may seem daunting at first, but with careful planning and attention to detail, it’s an achievable project. By following these steps, you can create a system tailored to your needs, whether for gaming, work, or everyday tasks. Enjoy the satisfaction of using a computer you built yourself!